Before I begin I'd like to say I'm writing this tutourial based on how I attach images to greif reports in the 'report abuse' section.
Also I'm not the best at writing tutorials so I apoligise if some parts are hard to understand, but I thought I'd give it a try. If need be I can revise this tutorial to fill in any gaps that you feel need filling. As a result this Tutorial is likly to be updated and edited based on comments recieved, this proccess will keep repeating until I have fine tuned all the gaps and finalized this tutourial.
NOTE: This method works for both online browser and WoM client.UPDATE: REVISION 1.1_01 Been experimenting with a more viable and open method, Updated accordingly. Revision Credit:
ZionFoxUPDATE: REVISION 1.1_02 Added Attachment limits to SECTION 3)A. Revision Credit:
ZionFoxUPDATE: 22/07/2011 REVISION 1.1_03Section 1 redetailed/ made more though. Also made sub-Headings stand out. Revision Credit:
TheWarpuppyUPDATE: 22/07/2011 REVISION 1.2 New section added detailing /highlight. Revision Credit:
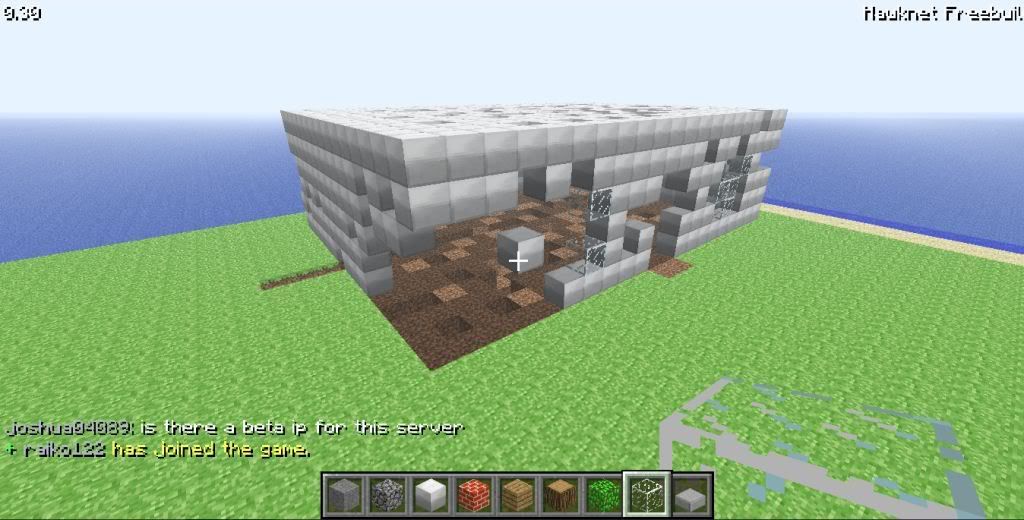
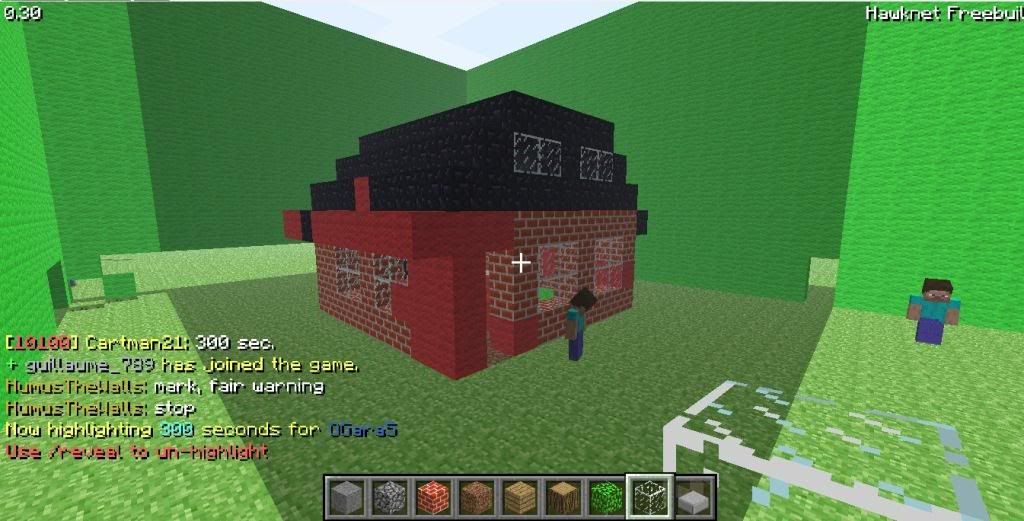
HumusTheWallsREPORTING GRIEF AIDHere we have a basic hollow Cubiod. For purpose of demonstration let's just say it's yours or someone else House
Here we are before Grief Attack.

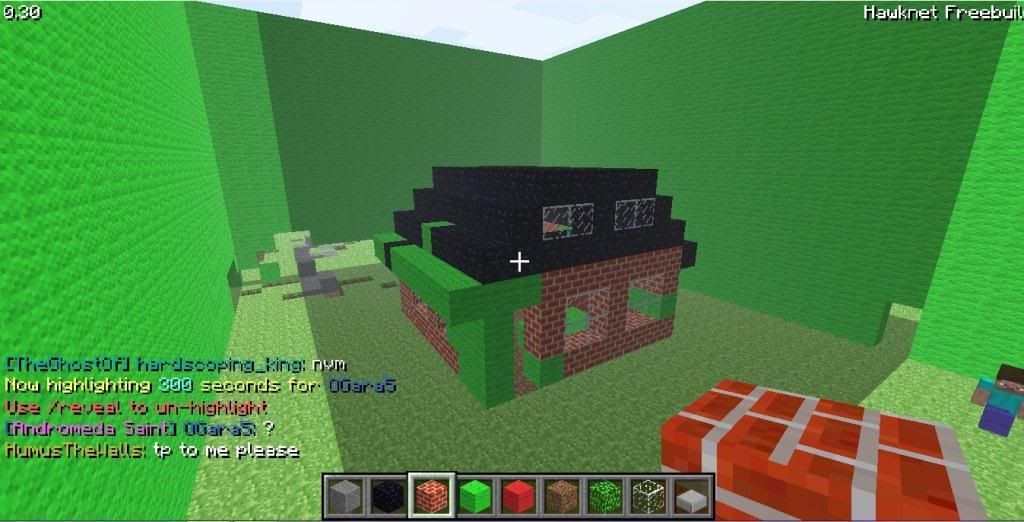
And now after...
 1.a) Getting the evidence.
 First of all We need to find out who the culprit is
So we use this command.

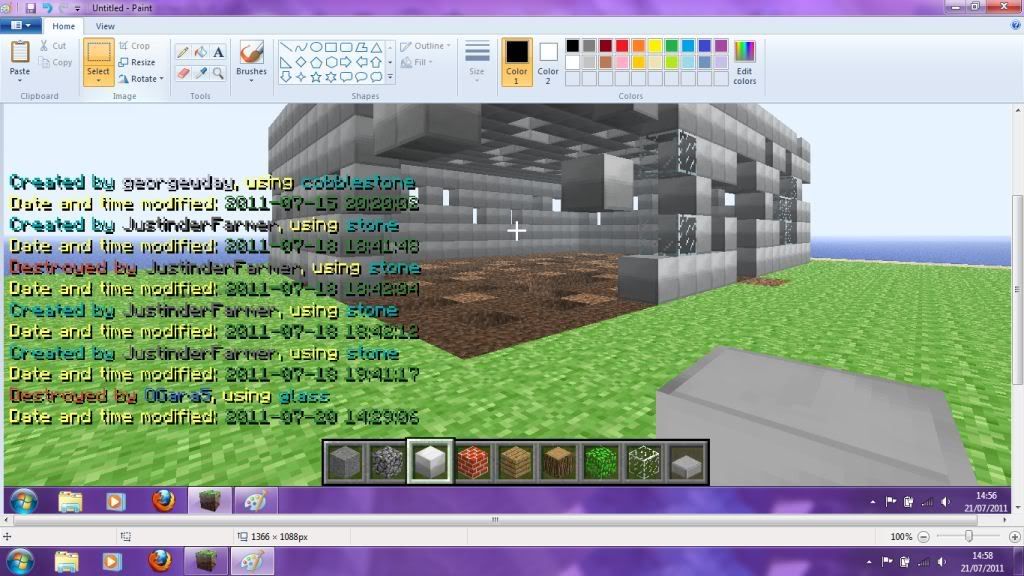
The Command (/b) is a shortcut for '/about'. '/about' shows a blocks History, showing who has built in that blocks space and whoever has destroyed a block form that place cosequentially it is also our key weapon agaisnt Greifers.
So let's see Who bust this build
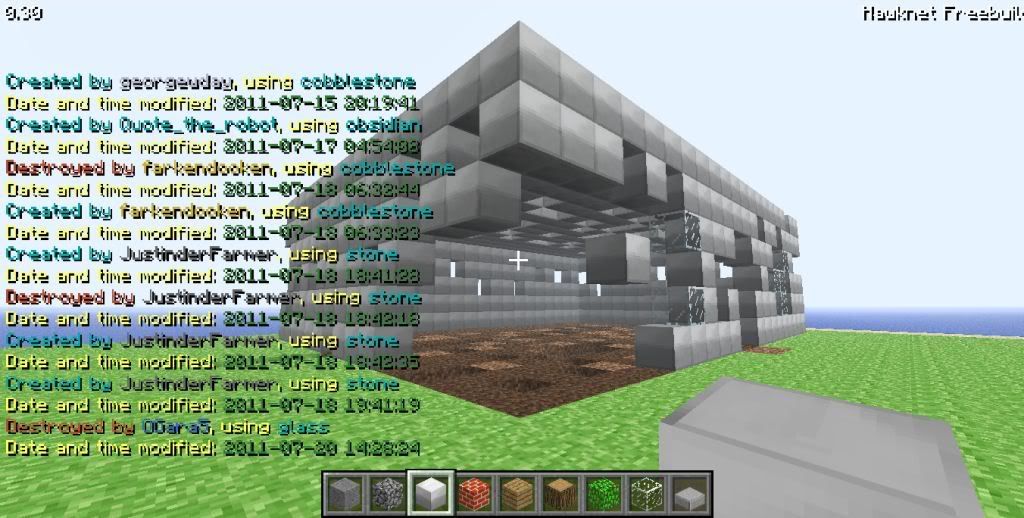
Oh it's me?

BAD OGARA!!!
As exhibited in the image, the list shows
'Created By:' and
'Destroyed By:',
Come acoss a house or tower with loads of random holes in it?
Use the command (/about OR /b) and
pay specific attention to the last Name listed under 'created by' and the name(/s)
that follow listed as 'Destroyed by:'.EXAMPLE:If a structure is listed as
Created By:'Player X'
Destroyed By:'Player I'
The names DON'T match up, well that's bad news.
Created By:'Player N'
Destroyed By:'Player N'
The names DO match up, OK but let's look into this further...
Created By:'Player O' <-- What's this?
Destroyed By:'Player V' <-- He/She is in trouble now.
Created By:'Player V'
Destroyed By:'Player V'
Having analyzed the evidence and making an educated evalution let the Greifer Busting commence.

But maybe it's not that simple...
1.b) Highlighting.This section is about the command '/highlight'
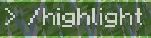
Useful for gathering detailed evidence of grief, the command (/highlight) can be used to show evidence of grief even if the grifer has destroyed the whole structure.
To use the command in game input as follows:
/highlight [username] [time(seconds)]
By default the command will show a users last 300 seconds
Here's an example of /highlight in action...
Yes I griefed someone elses house but did so FOR SCIENCE!!

(and with perpission, they was in on it to)
The command (/highlight) shows a players history of placing and destroying blocks through the use of two colours.
Green blocks are blocks built by that user.
Red Blocks are blocks destroyed by that user.Beacause of the way the command (/highlight) works it can also see who placed/destroyed
using commands like /z (/cubiod). Therfore making it more effective in certain situations than /b.
Additionally because of how the command (/highlight) works even if a griefer has repaired their trail they cant hide.
I fixed the house atleast.
 2) Aqqiuring a screenshot.
Using the 'Prnt Scren key on your key board (Normally at the top right between 'F12' and 'Insert') copy the image then open MS Paint. When in 'Paint' Paste your 'Prnt Scrn' image by clicking the 'Paste' icon. At this stage your 'Paint' application should contain a screenshpt of your Game window.
Crop the image so that only the actaul Game window is visable this reduces the liklyhood you will need to follow the next step. (Especially if playing through Minecraft.net online browser, WoM users however will need to carry out the next step.)
Save the evidence. (I normally save it under the Greifers name in a special Folder purly for grief Evidence.)
3) Compressing to a sutible Attachment size This is where it might get confusing as there's two ways to do this
A) Resizing in PaintHaving Cropped your image You should have save as the next part is trial and error.
Resize your Cropped 'Paint' canvas by percentage ratio so that th proportions remain the same.(I would reccomend setting between 60-70% of 'current size') so that it shrinks the whole image.
In the bottum bar for Paint are the current stats for the image.
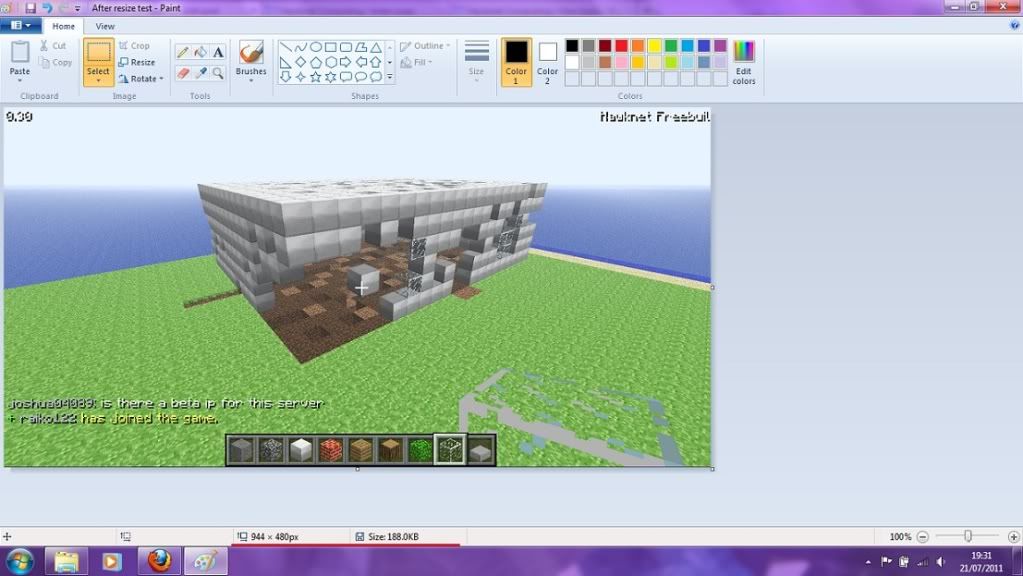
Attachments will only be accepted under if they are under 256k. Though there is no demision limit it is requested that width reamins less than 920 as to not destroy the forum template.
Save as JPEG as this is will allow a more compact image while still being of fair quality.
If the saved file size still exceeds the maximum size, limit repeat this step.
Warning: The smaller you make the image the lesser the quality will be
B) Resizing in Microsoft OfficeThis is my preferred method.
Open the Evidence in Microsoft Office. Left Click (LC) 'Edit Pictures' then locate and LC the option to 'Compress' If done correctly you should have a menu down the right of your screen like the one shown in this picture.
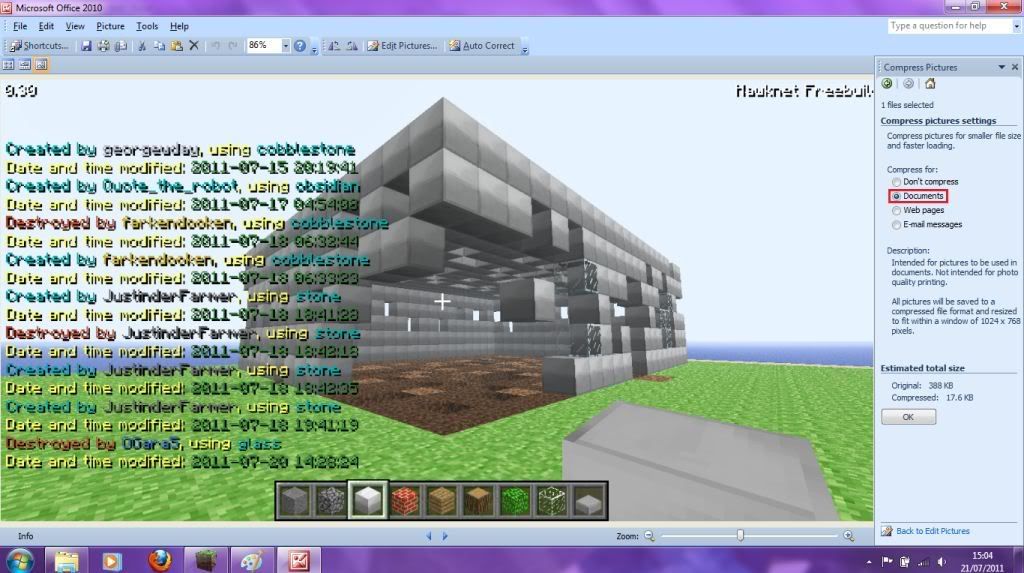
Select Compress to Document (as shown) and LC 'OK'
When compressed click the 'RED X' at top right of screen. You'll be asked 'Do you want to save changes' click yes.Then a second pop up should appear (Can never be bothered to read it
) which asks if you you want to 'create files' This happens beacuse Paint saves in '.png' format. The new compressed images are saved as 'JPEG'
The program won't exit if done correctly.
Click the 'RED X' again, You will be asked if you like to save changes (again) even though you;ve not edited any further. Click 'No'
Now your image is small enough to attach as evidence.
Final evidence attached.
So OPS here's a greifer BAN HIM!

Attachment:
 Info.jpg [ 116.81 KiB | Viewed 7621 times ]
Credits (and Thanks to):
Countyfan1: for making the tutorial section
ZionFox: for his advice in improving this topic and hosting the server and furoms
Satan360100:for giving me the idea to set up this tutorial
TheWarpuppy: Pionting out some of the missing detials from draft.
HumusTheWalls:For letting me use his house to demonstrate /highlight.
Screenshots were taken by me with some input from Satan360100
I hope you found this Tutorial has helped you in some way.
I even had a laugh writing this so it can't be THAT bad.
If you have any questions about this tutourial please leave a comment and I will do my best to respond to it.